

 ΕΛ
ΕΛProduct Information
ACTIVATION
With the purchase, you will need to authenticate yourself through the application by entering some details that are unique to each issuer who has installed the application. Each e-cash register has three unique identification elements Serial number, Username, Password. These are given to you with the purchase of the package so that you can activate the application according to the steps described below.
Note The application gives you the possibility to activate the application not only in the central store but also in your branches
ENTERING ACTIVATION DETAILS #
Upon entering the application, your unique details will appear for you to proceed with the activation by clicking the Activate button
- Serial number
- Username
- Password
All three of these details are given to you upon purchasing the e-Cash Register.
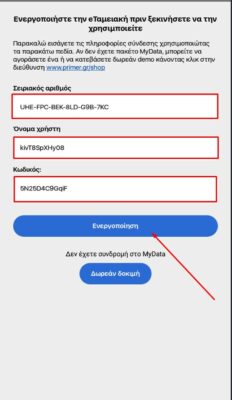
Once you click the Activation button, the screen will appear where you must type your VAT number, in order to perform the necessary check and proceed to the next steps. If the VAT number is not valid, the following message will appear
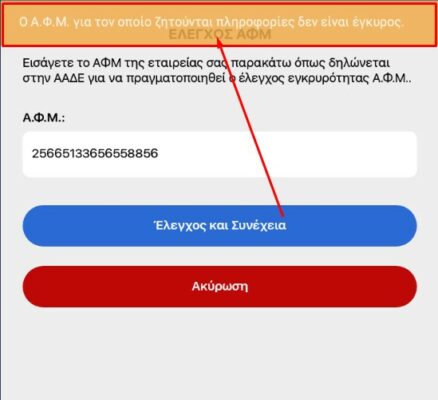
When the VAT number is correct, then by clicking the Check and Continue button, the next screen titled Activation will be displayed
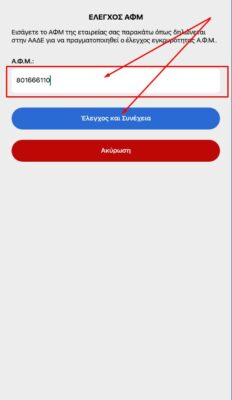
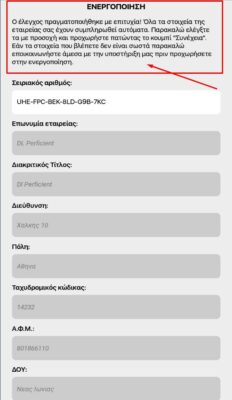
If the check is successful, then the corresponding message will appear as shown in the next screen
ATTENTION! All company details that will appear are automatically extracted based on the VAT number and you should check them.
In case any detail is not correct, you must contact the Primer support department before proceeding to the application
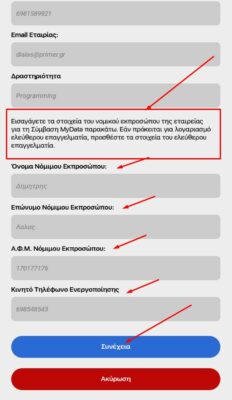
Next, you will be asked for details of the Legal Representative of the company for the My Data contract. If you are a Freelancer, then you will add the details of the Freelancer and click the Continue button
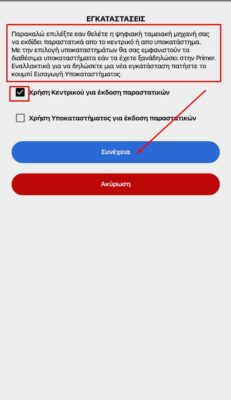
During the installation of the application, you have the possibility to choose whether you want to install it only in one store which is also your central store or in as many branches as you have. By selecting Use Central for issuing invoices, you select the central store by clicking the Continue button
After clicking the Continue button, all the company details that are registered in the application will be displayed, in order for you to do a final check for their accuracy, before proceeding to the last step by clicking the Activate button

In case we want to install the application in all our branches, then by clicking the option Use Branch for issuing invoices, we must enter the details of the branches by clicking the Add Branch button. If we have (e.g. only one branch) then by clicking the Continue button, the details we have entered will be displayed for us to do the relevant check for their accuracy.
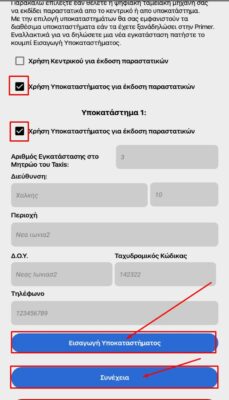
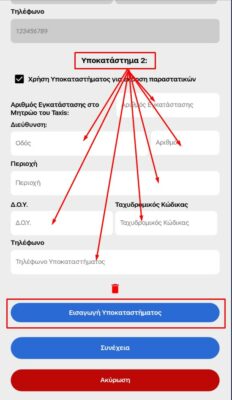
Every time we click the Add Branch button, a new screen appears for us to register the new branch.
To be able to check the accuracy of the details we have entered, by clicking the Continue button, just as in the case of one central store, so now, all the stores we have entered will be displayed.
ATTENTION! You should check very carefully the accuracy of the details you have entered before clicking the Activate button
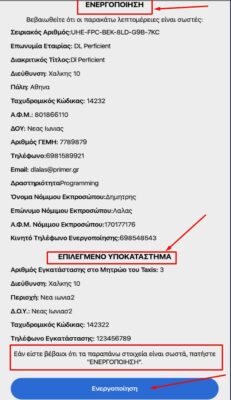
Upon completion of the activation steps, the message that your application has been successfully activated will appear. Read the message on the last screen very carefully, as you will need to take some further steps via GOV.GR and TAXISNET before you can start issuing receipts. Reaching the last screen and clicking the ok button, the detailed instructions will be automatically sent to the email you have provided us to complete all the prerequisites with AADE.
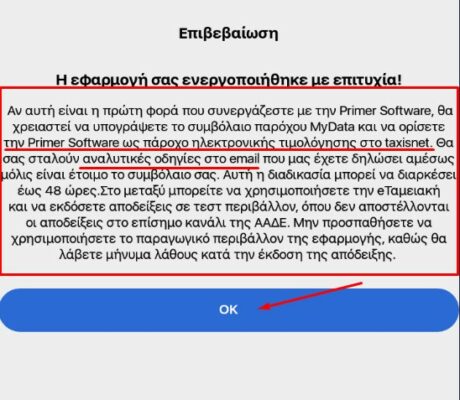
The email you will receive will be the following and by clicking on the relevant links you will complete all the registration and application activation steps
The MyData contract with Primer Software is ready. You can view and sign it electronically by logging into the gov.gr website (digital certification of private agreement) and then selecting the “Pending” option at the address https://www.gov.gr/ipiresies/polites-kai-kathemerinoteta/psephiaka-eggrapha-gov-gr/psephiake-bebaiose-idiotikou-sumphonetikou The acceptance of the contract takes place once and is necessary for the process of connection with a provider to proceed.
We remind you that it is mandatory to select the provider Primer Software in the TaxisNet of the issuing company. You can see more detailed instructions for signing a contract and accepting a provider by clicking on the link here