

 Ελληνικά
Product Information
CASH REGISTER – ISSUE RECEIPTS
ENTERING THE CASH REGISTER #
From the initial Options Menu we select the Cash Register button
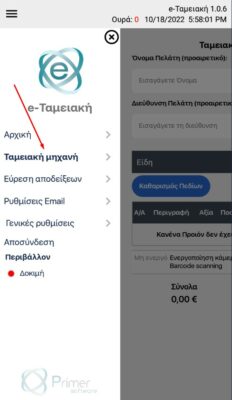
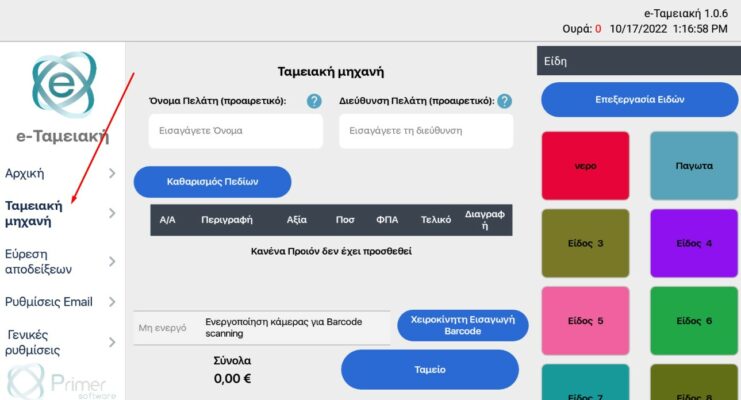
TABLET SCREEN
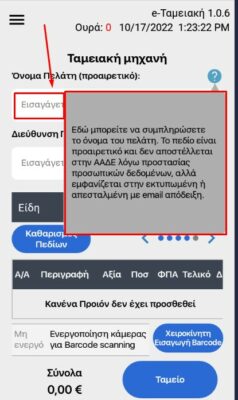
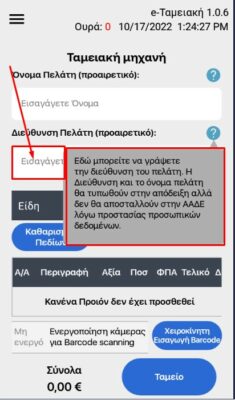
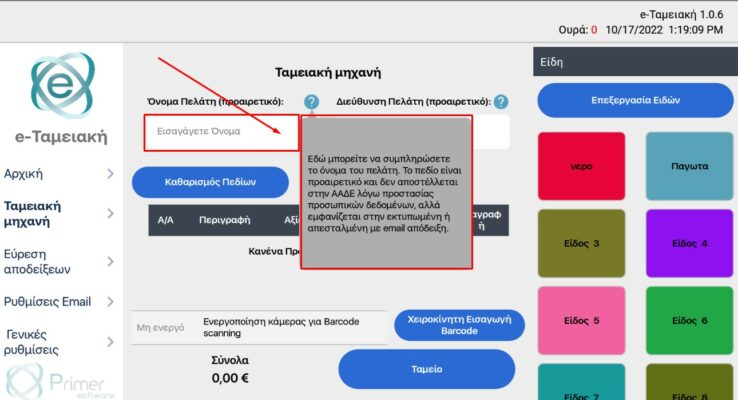
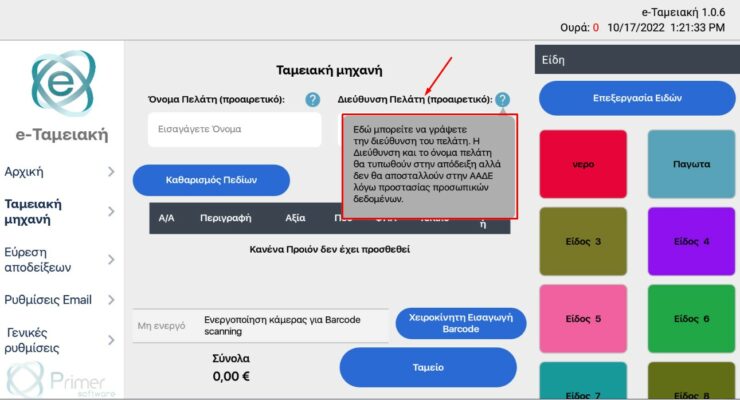
After selecting Cash Register, the Customer Name and Customer Address fields will appear for completion. Completing these fields is not mandatory and the data entered is not sent to AADE, as it concerns personal data.
If we choose to proceed with their entry, then they will appear ONLY on the receipt issued for the customer and will not be sent with the rest of the receipt details to AADE.
Relevant clarification messages are also displayed and by clicking the corresponding question mark of each field.
ITEM ENTRY #
The entry of items (products or services) in the receipt we want to issue can be done either through manual selection of the items we have already edited and saved in the application during the configuration stage, or by using the product’s barcode.
MANUAL SELECTION OF ENTERED ITEMS #
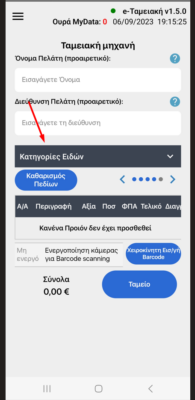
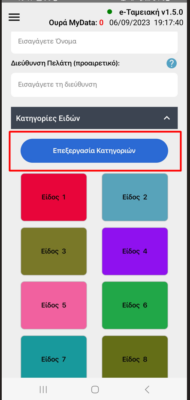
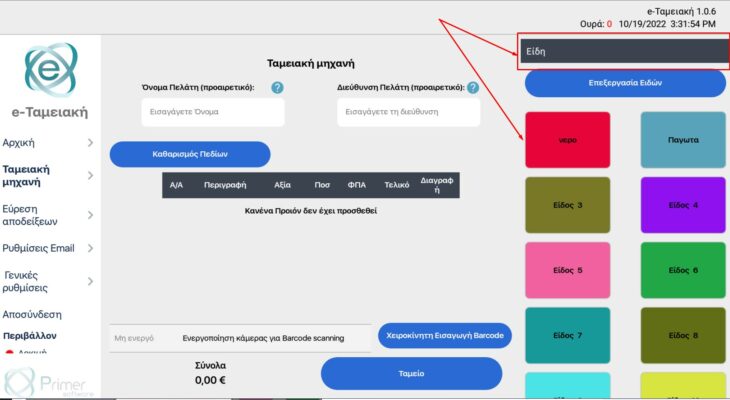
By clicking the Item Categories button, the list of items we have already entered during the initial configuration of the application is displayed. (The entered items can be edited again whenever we want to issue a receipt).
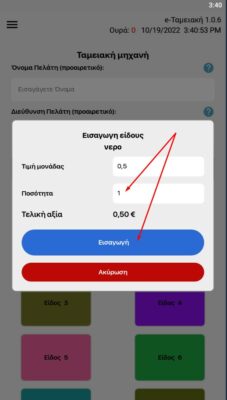
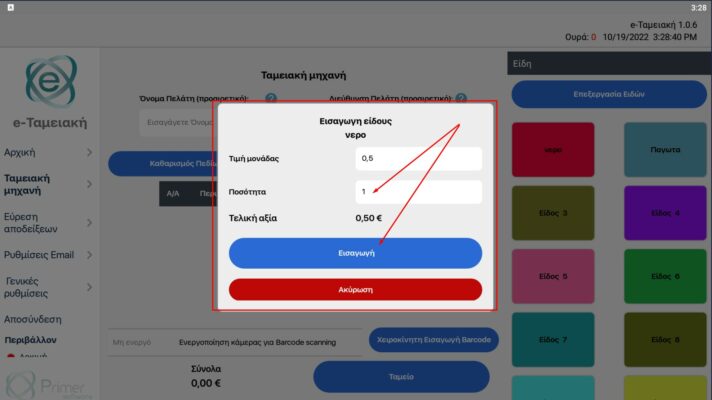
If we do not wish to edit the items, but the already entered ones are sufficient, we proceed to select the Item from the available ones displayed in the list. Upon selecting the item, its default quantity and price will appear on our screen, details which we can change and then click the Insert button and the selected Item with the specific quantity and price we have entered is transferred to the Customer’s cart.
MOBILE SCREEN
TABLET SCREEN
TABLET SCREEN
EDIT ITEMS #
By clicking the Edit Categories button, we are given the ability to edit any item we want, as long as we select it.
The steps for Editing Categories are described in detail in the Application Configuration section.
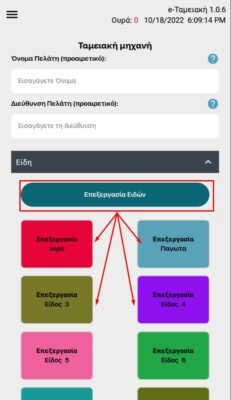
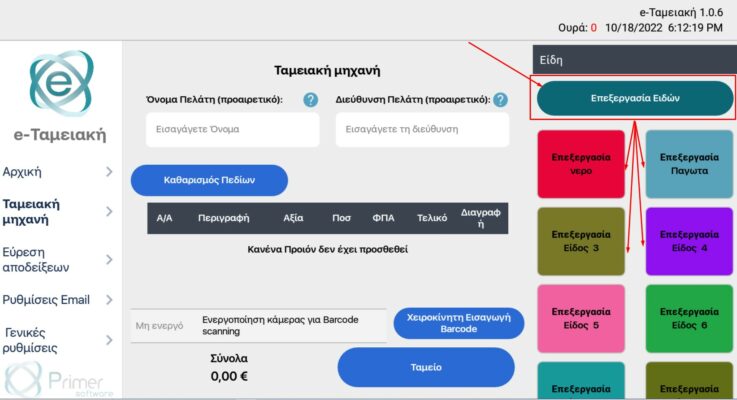
When we have completed the editing, we click the “Close Category Editing” button
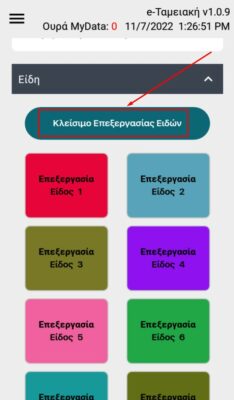
MOBILE SCREEN
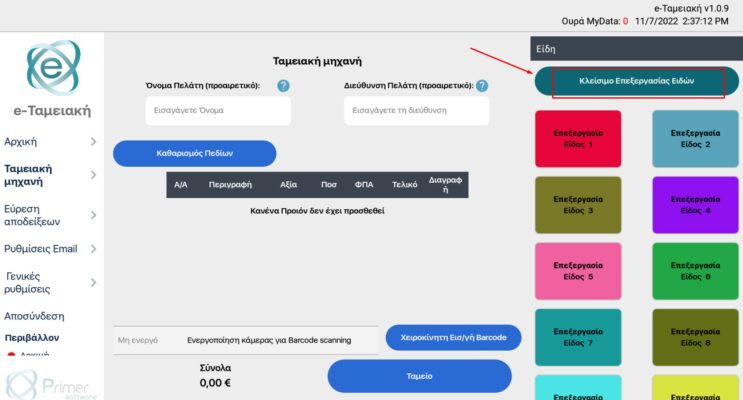
TABLET SCREEN
ITEM ENTRY USING BARCODE #
The entry of items in the receipt using a barcode can be done in three ways :
- By activating the camera of the mobile or tablet, to scan the product barcodes.
- By connecting and activating a separate Barcode Scanner device (the way of connecting and activating the Barcode Scanner is analyzed in detail in the General Settings).
- By manual entry of the barcode, typing the corresponding number.
CAMERA ACTIVATION #
We click the Activate camera for Barcode scanning button
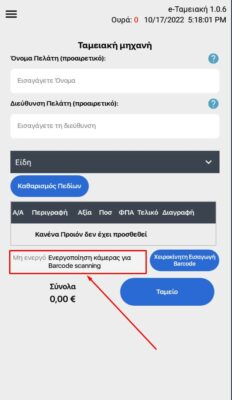
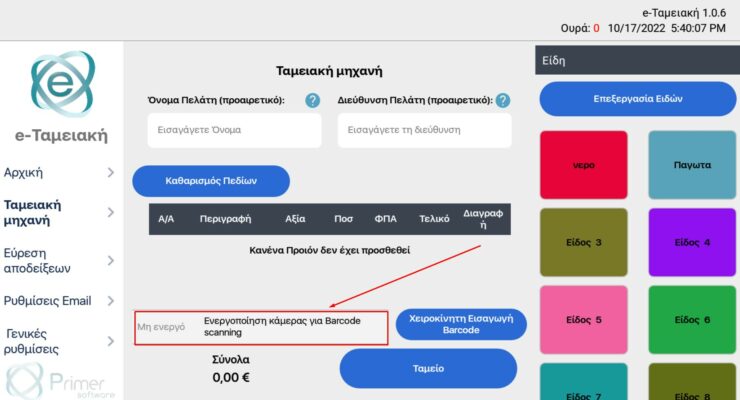
TABLET SCREEN
Once the camera of the device we are using is activated, the command Scan the Barcode for the insertion of the products. will appear. We proceed to scan the barcode of each product and it is automatically added to the receipt.
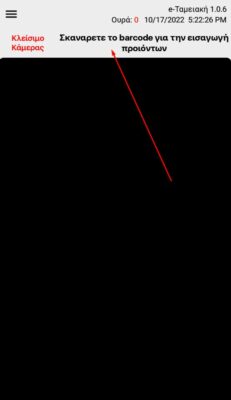
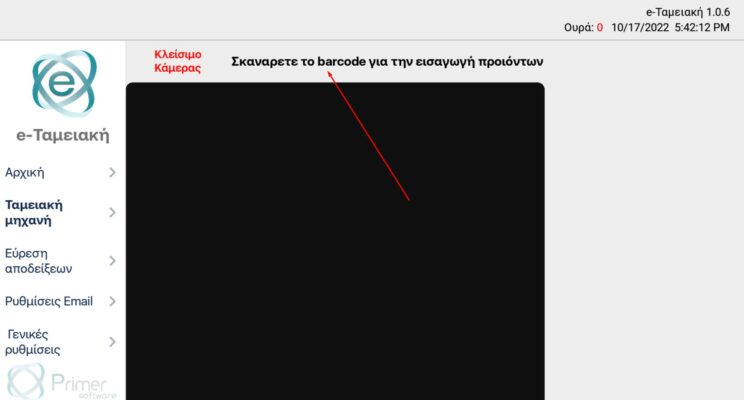
TABLET SCREEN
BARCODE SCANNER ACTIVATION #
If you choose to use a separate Barcode Scanner device, then in the field below the option Enable Barcode Scanner will be available to proceed with scanning.
The way to connect and activate the Barcode Scanner is described in detail in the General Settings section
TABLET SCREEN
MANUAL BARCODE ENTRY #
In case scanning a barcode is not possible, we are given the option to type the corresponding barcode of the product by selecting the Manual Barcode Entry button on the screen. As soon as we type the barcode number in the relevant field that appears, we click Add and the product has been automatically added to the list.
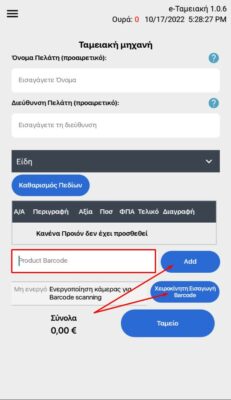
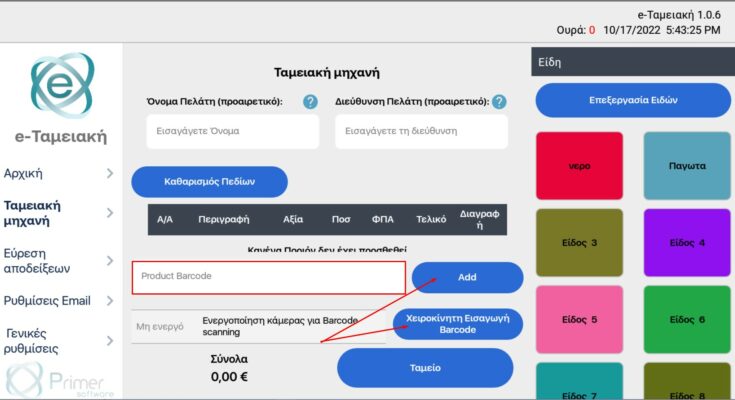
TABLET SCREEN
CHECKOUT #
CHECKOUT FINALIZATION #
After completing the entry of the Items (products or services), following one of the above entry options, the list we created and the total amount to be paid by the Customer is displayed. Each product is displayed in detail on a separate line, at the end of which there is the button with the red trash can which gives us the possibility by clicking it to delete the corresponding selected product from the list we created.
In case, before finalizing the Checkout, we want to change the final quantity or the price of an item (e.g. from one piece we had initially selected upon entering the product, to finally charge five pieces), we can do it by selecting the line in which the specific product is entered.
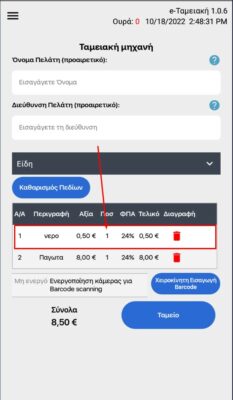
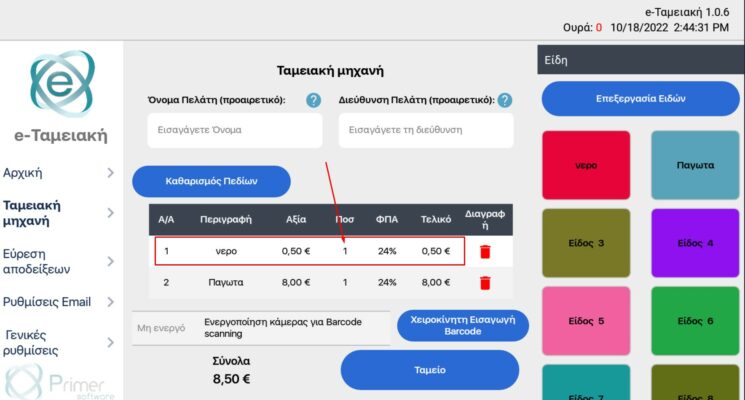
TABLET SCREEN
By selecting the product bar, the product editing screen opens again (the same one that was displayed during its initial insertion in the cart), where in the pieces we will type the new quantity we want. Automatically, the final value is also updated based on the quantity and we must click the Update button, to make the corresponding change on the screen where all the products for purchase are displayed.
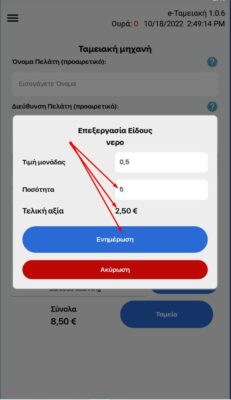
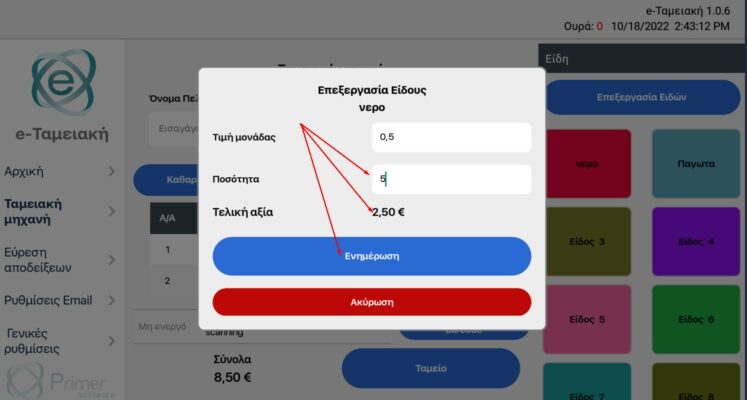
TABLET SCREEN
As shown in the screen below, the change was made successfully. and we can proceed by clicking the Checkout button.
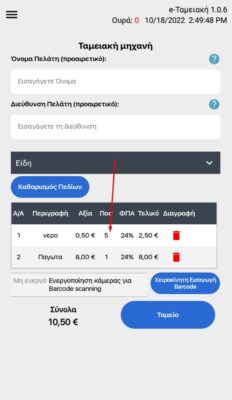
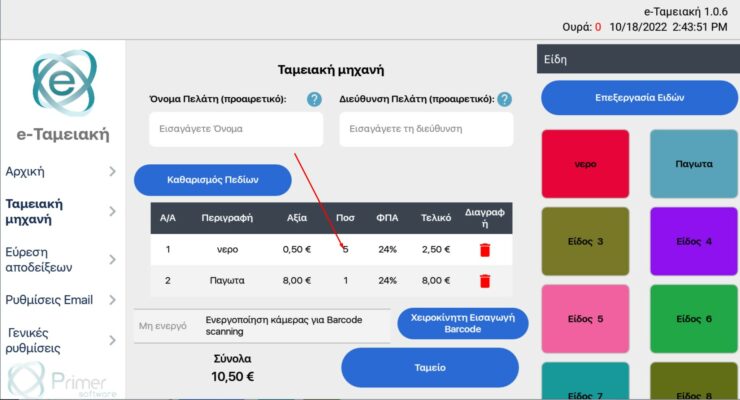
By clicking the CHECKOUT button we proceed to pay for the products. The payment steps are described in detail below.
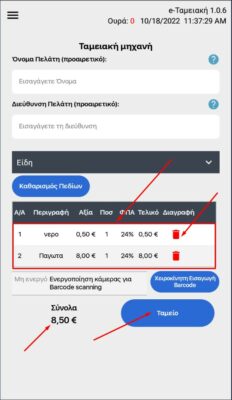
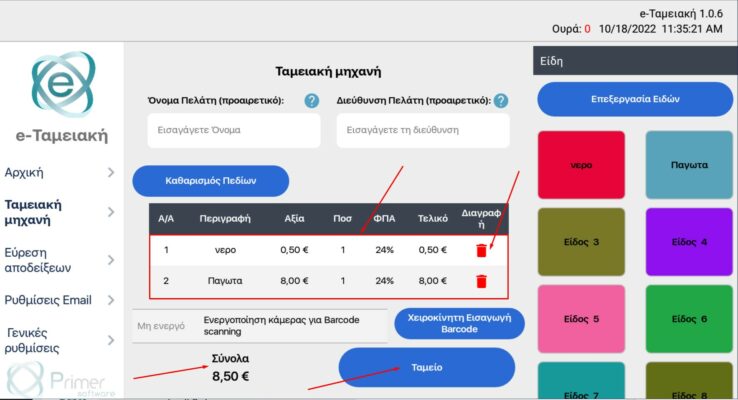
TABLET SCREEN
In case we want to cancel all the products because the customer does not want to proceed with the purchase, then we can use the Clear Fields button.
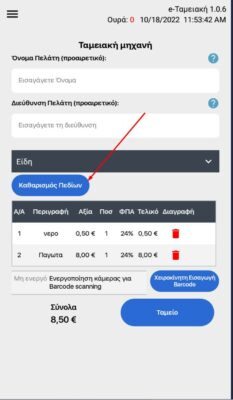
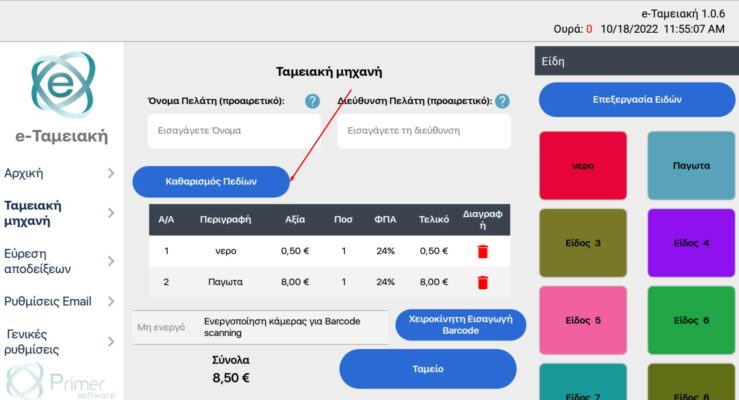
TABLET SCREEN
PAYMENT METHODS #
After clicking the Checkout button, the Issue Receipt screen will appear.
On the Issue Receipt screen, the final value of the purchase and the available payment method options Cash, Card, Credit, Bank Account are automatically displayed.
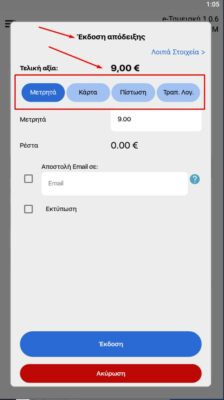
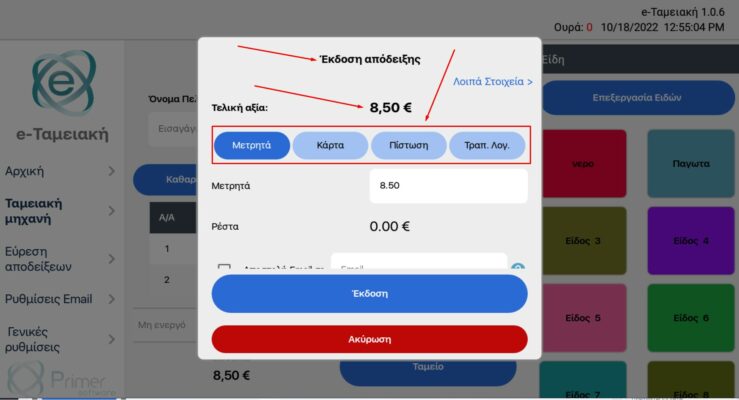
In the following screens you will see in detail all payment methods and the steps we follow.
CASH PAYMENT #
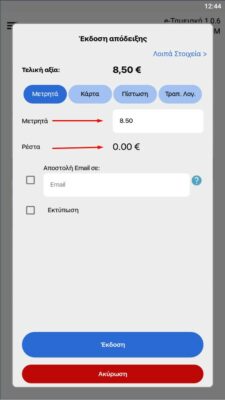
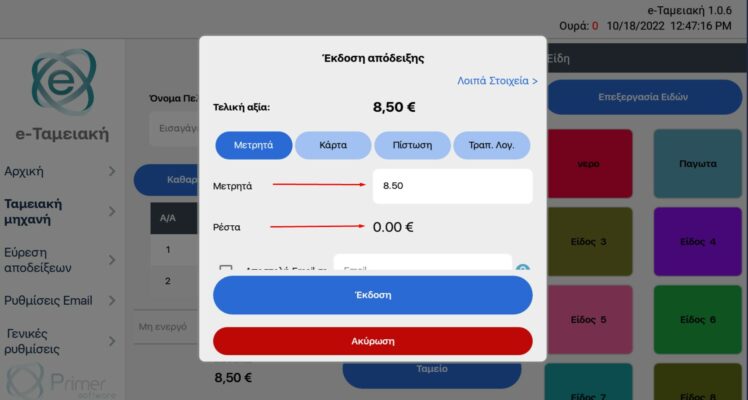
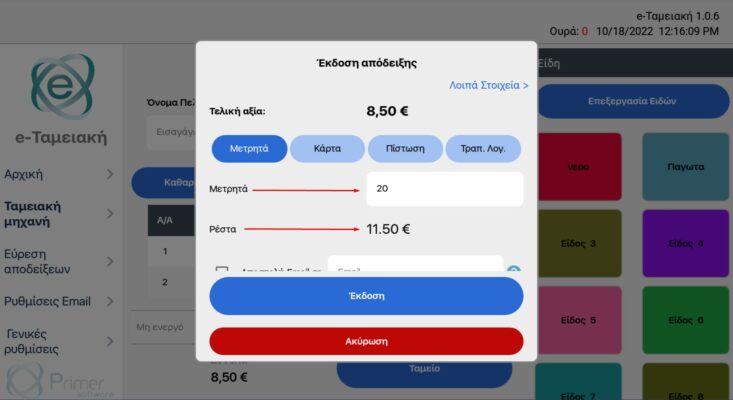
If the Customer has chosen to pay with Cash and we have clicked the corresponding button, we will see that below the payment methods two fields appear: the Cash field and the Change field. In the Cash field the amount to be paid is pre-filled and if the Customer hands over the exact amount, then the Change field will be zero (0,00€).
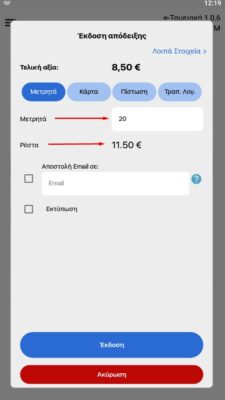
In case the Customer does not have the exact amount (e.g. 8,50€) and hands over money of greater value with (e.g. 20€), then in the Cash field we must fill in the amount we received from the Customer (e.g. 20€), and immediately in the Change field it will automatically display the amount we must return to the Customer as Change (e.g. 11,50€).
TABLET SCREEN
TABLET SCREEN
CARD PAYMENT #
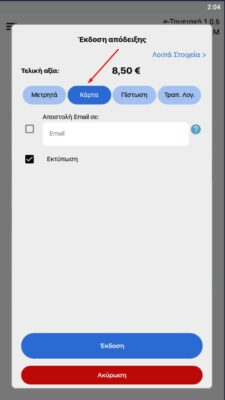
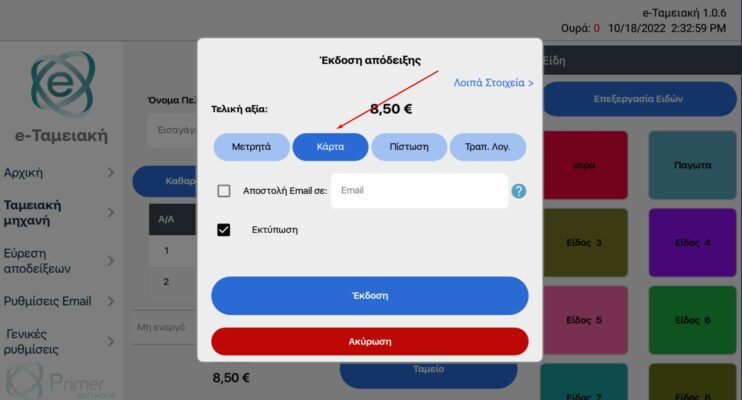
In case the Customer wishes to pay using a debit or credit card, on the Issue receipt screen we select Card and complete the process of charging the Customer’s card, according to the instructions we have received from the payment provider we cooperate with.
CREDIT PAYMENT #
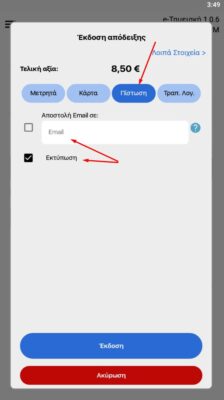
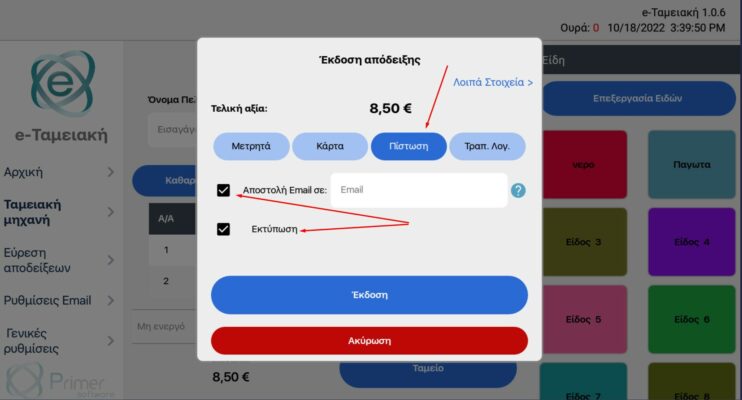
To select credit as the payment method of the receipt, we click the corresponding Credit button. With this option, fields regarding change, etc. are not displayed (due to the crediting of the amount) and we immediately proceed to the next steps for issuing the receipt which will be explained in detail below.
TABLET SCREEN
BANK ACCOUNT PAYMENT #
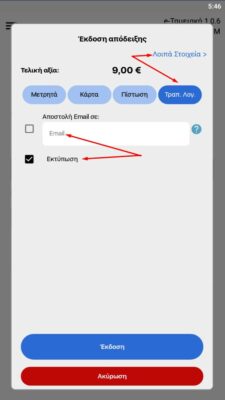
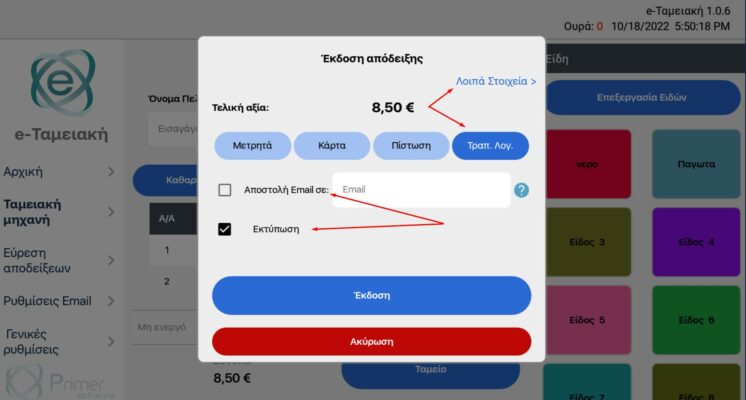
For the bank account payment option, we click the corresponding button. With this option, fields regarding change, etc. are not displayed (due to the deposit of the exact amount by the Customer to the bank account we will indicate to them) and we immediately proceed to the next steps for issuing the receipt which will be explained in detail below.
ISSUE RECEIPT #
PRINTING RECEIPT – SENDING EMAIL #
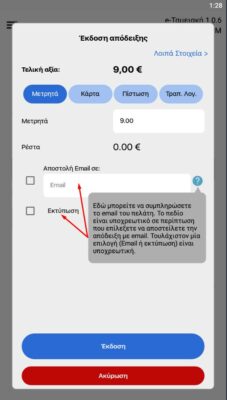
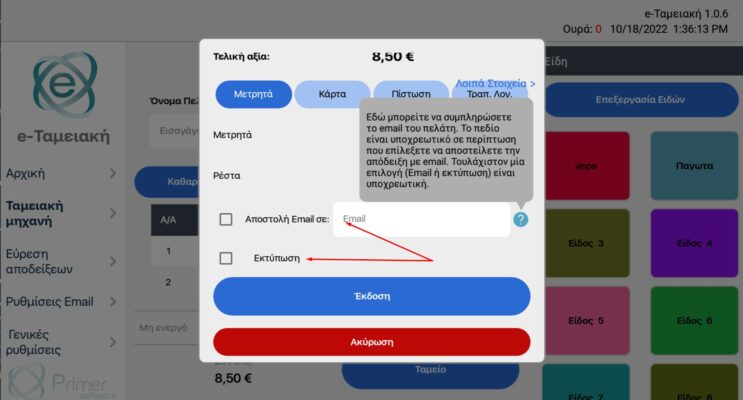
After selecting one of the above ways to enter the payment method and completing the mentioned steps, all that remains is to select whether we want to send the receipt to be issued by email to the Customer and/or print the receipt.
On the screen that appears in all the above payment methods, there are the following options and you can select only one or both in case you want the receipt to be both printed and sent to the Customer by email.
ATTENTION! At least one option is mandatory and if you select to send an email you must fill in the Customer’s email address in the relevant field.
MOBILE SCREEN
COMPLETING OTHER DETAILS #
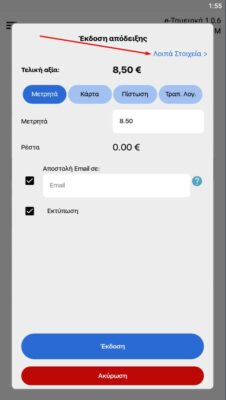
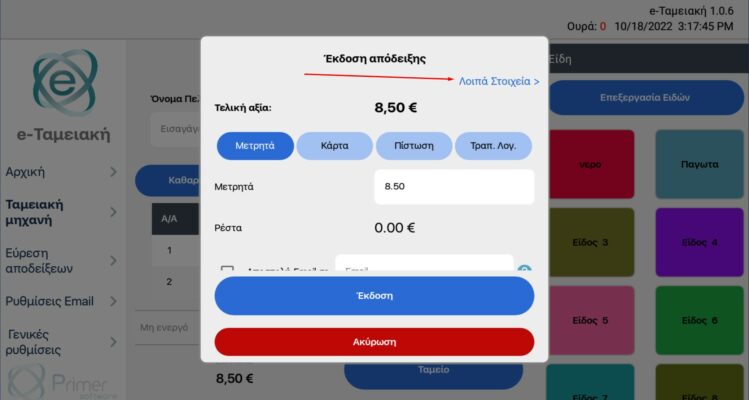
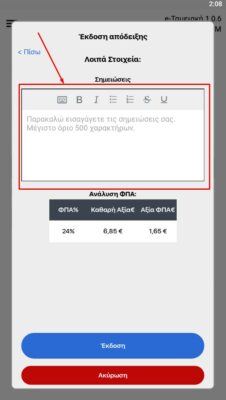
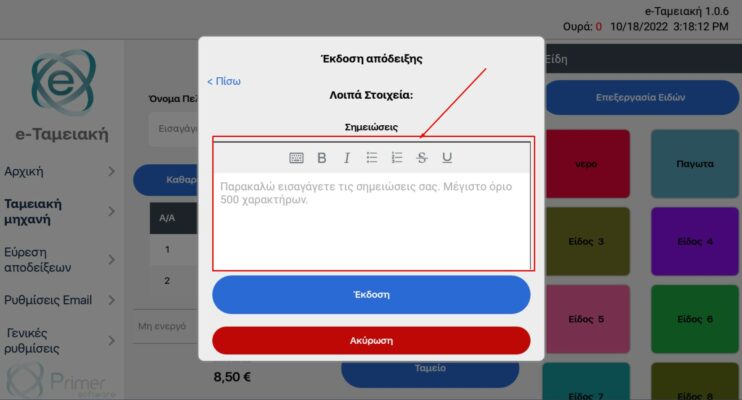
By selecting the Other Details button, we have the ability to add to the receipt a note that we consider important (e.g. the detailed description of a service or the bank account number to which the Customer will deposit the money for payment, etc.)
ATTENTION! Whatever is entered as a note will be included in the receipt to be issued (printed form and email form) depending on the option we have made in the previous step, but it will NOT appear in the details to be sent to AADE, as it is not a tax element of the receipt.
TABLET SCREEN
FINAL RECEIPT ISSUE #
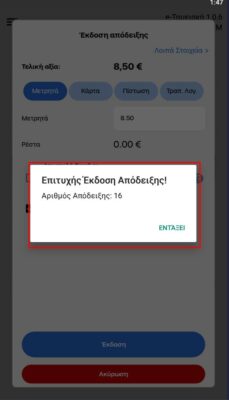
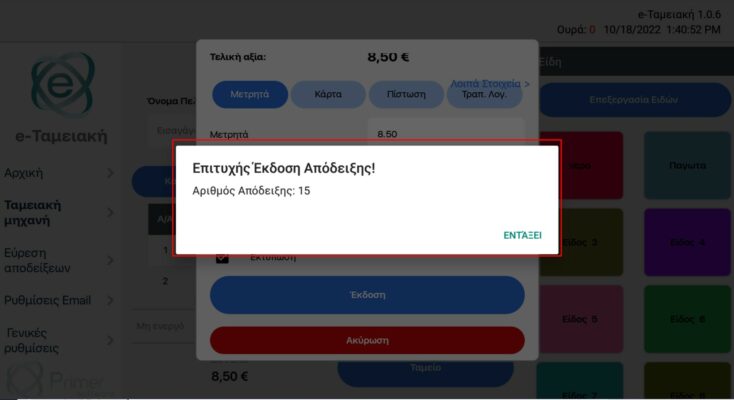
By clicking the Issue button, the Successful Receipt Issue message will appear and we have successfully completed the process!
TABLET SCREEN
PENDING RECEIPTS FOR PRINTING #
RECEIPT “QUEUE” #
ATTENTION! You should always check upon entering the application if there are pending receipts in the queue.
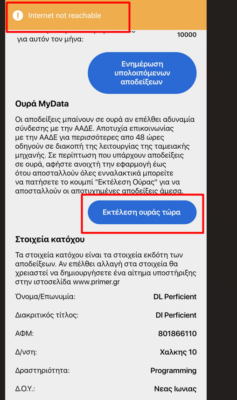
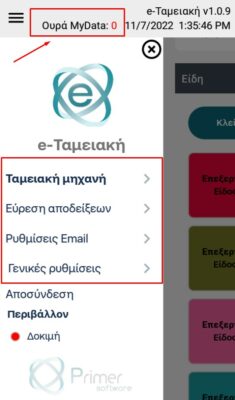
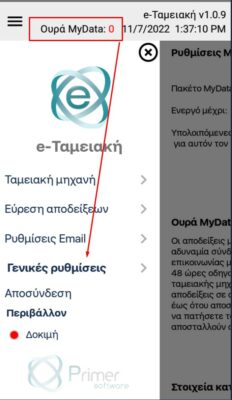
On all screens of the application and regardless of the stage you are at Entry, Checkout, Find receipts, Settings you will ALWAYS be shown at the top of the screen the receipts that due to connection failure could not be sent to AADE and do not have a Mark and QR code. The system tries for 48 hours to complete the submission.
Receipts within the 48-hour period are Legal and accepted by AADE as they state “Connection Failure”. This note on the receipt “justifies” the lack of a Mark and QR code ONLY for the period of 48 hours. Upon restoration of the connection and their submission to AADE, then a message appears that AADE received them and they get a Mark and QR code.
ATTENTION! If the connection is not restored after the 48 hours, the receipts may be considered overdue by AADE and there is a risk of fines.
Note. To be able to issue new receipts, the connection must be restored and all receipts that are in the queue must have been sent to AADE, as the application will remain locked until then.
A relevant message will also be displayed in the application.
MOBILE SCREEN
After the message appears, you should go through the Options Menu to General Settings, as described below.
ADD TABLET
If there are pending receipts you must select from the Options Menu and go to General Settings
MOBILE SCREEN
ADD TABLET